Open the selected Part for edit.
The Part form will appear, with the BOM tab selected.
Select Pick Related from the drop-down box next to Actions ![]() . Should you choose to create parts right from the BOM table, see Create Related from BOM.
. Should you choose to create parts right from the BOM table, see Create Related from BOM.
Click on the New Item icon ![]() next to the drop-down box.
next to the drop-down box.
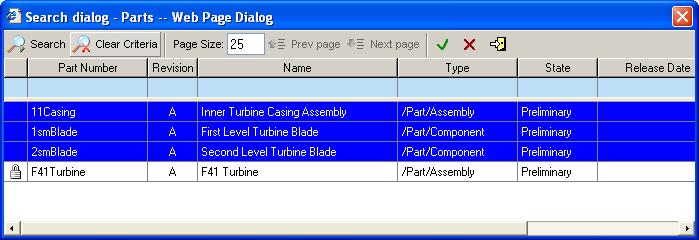
A new popup window displays the parts list from which the required parts can be chosen. You can search in this window for the parts that you need, using the basic searching techniques.

Select the part or parts that you want included in the BOM and click the green check ![]() icon to complete the selection. The chosen parts will appear on the BOM tab of the parent part.
icon to complete the selection. The chosen parts will appear on the BOM tab of the parent part.